Welcome to a weekly feature on my blog – Ben’s Zone. Written by husband… Ben. A foodie, coffee obsessed, ex-smoking, ex-drinking and Ridgeback loving Dad. Who is also seriously into his fitness. You can find him on the blog (most) Sundays. Enjoy 🙂

How to Fit a Multimac Carseat
You’d be forgiven for thinking our third child was not planned. Though we knew he was coming (and had hoped he’d come for a long time before that) we managed to be almost totally unprepared for his arrival when the time got near. As a result, I spent pretty much 4 months straight decorating in every spare moment I had. One thing that I did not think would be a problem was car seats. Our Skoda Superb Estate is nice and roomy, we knew it only had 2 ISOfix points in the rear but we figured that using the seat belt on one booster seat would be quite alright, this was an area we did not have to worry about, or so we thought.
Unfortunately it was not to be. When I test fitted the baby seat with the kids booster seats I got a rude awakening, yes, the 3 seats would fit across the back but only just, and there was no way to get the buckles in and out when getting the kids in. Just to install Bo’s baby seat meant pushing the other two seats right to the edge of the car. The kids thought it was a huge amount of fun, wriggling under their seat belts to get into the seats but for us, it wasn’t practical, nor were we convinced it was safe. We had to look for other options.
We could have gone down the people carrier route. The problem there was cost, if we could have broken our lease agreement at no cost, we’d still be looking at doubling our monthly repayment. Additionally, the Skoda has been a great car and we did not want to say goodbye to it for a baby bus.
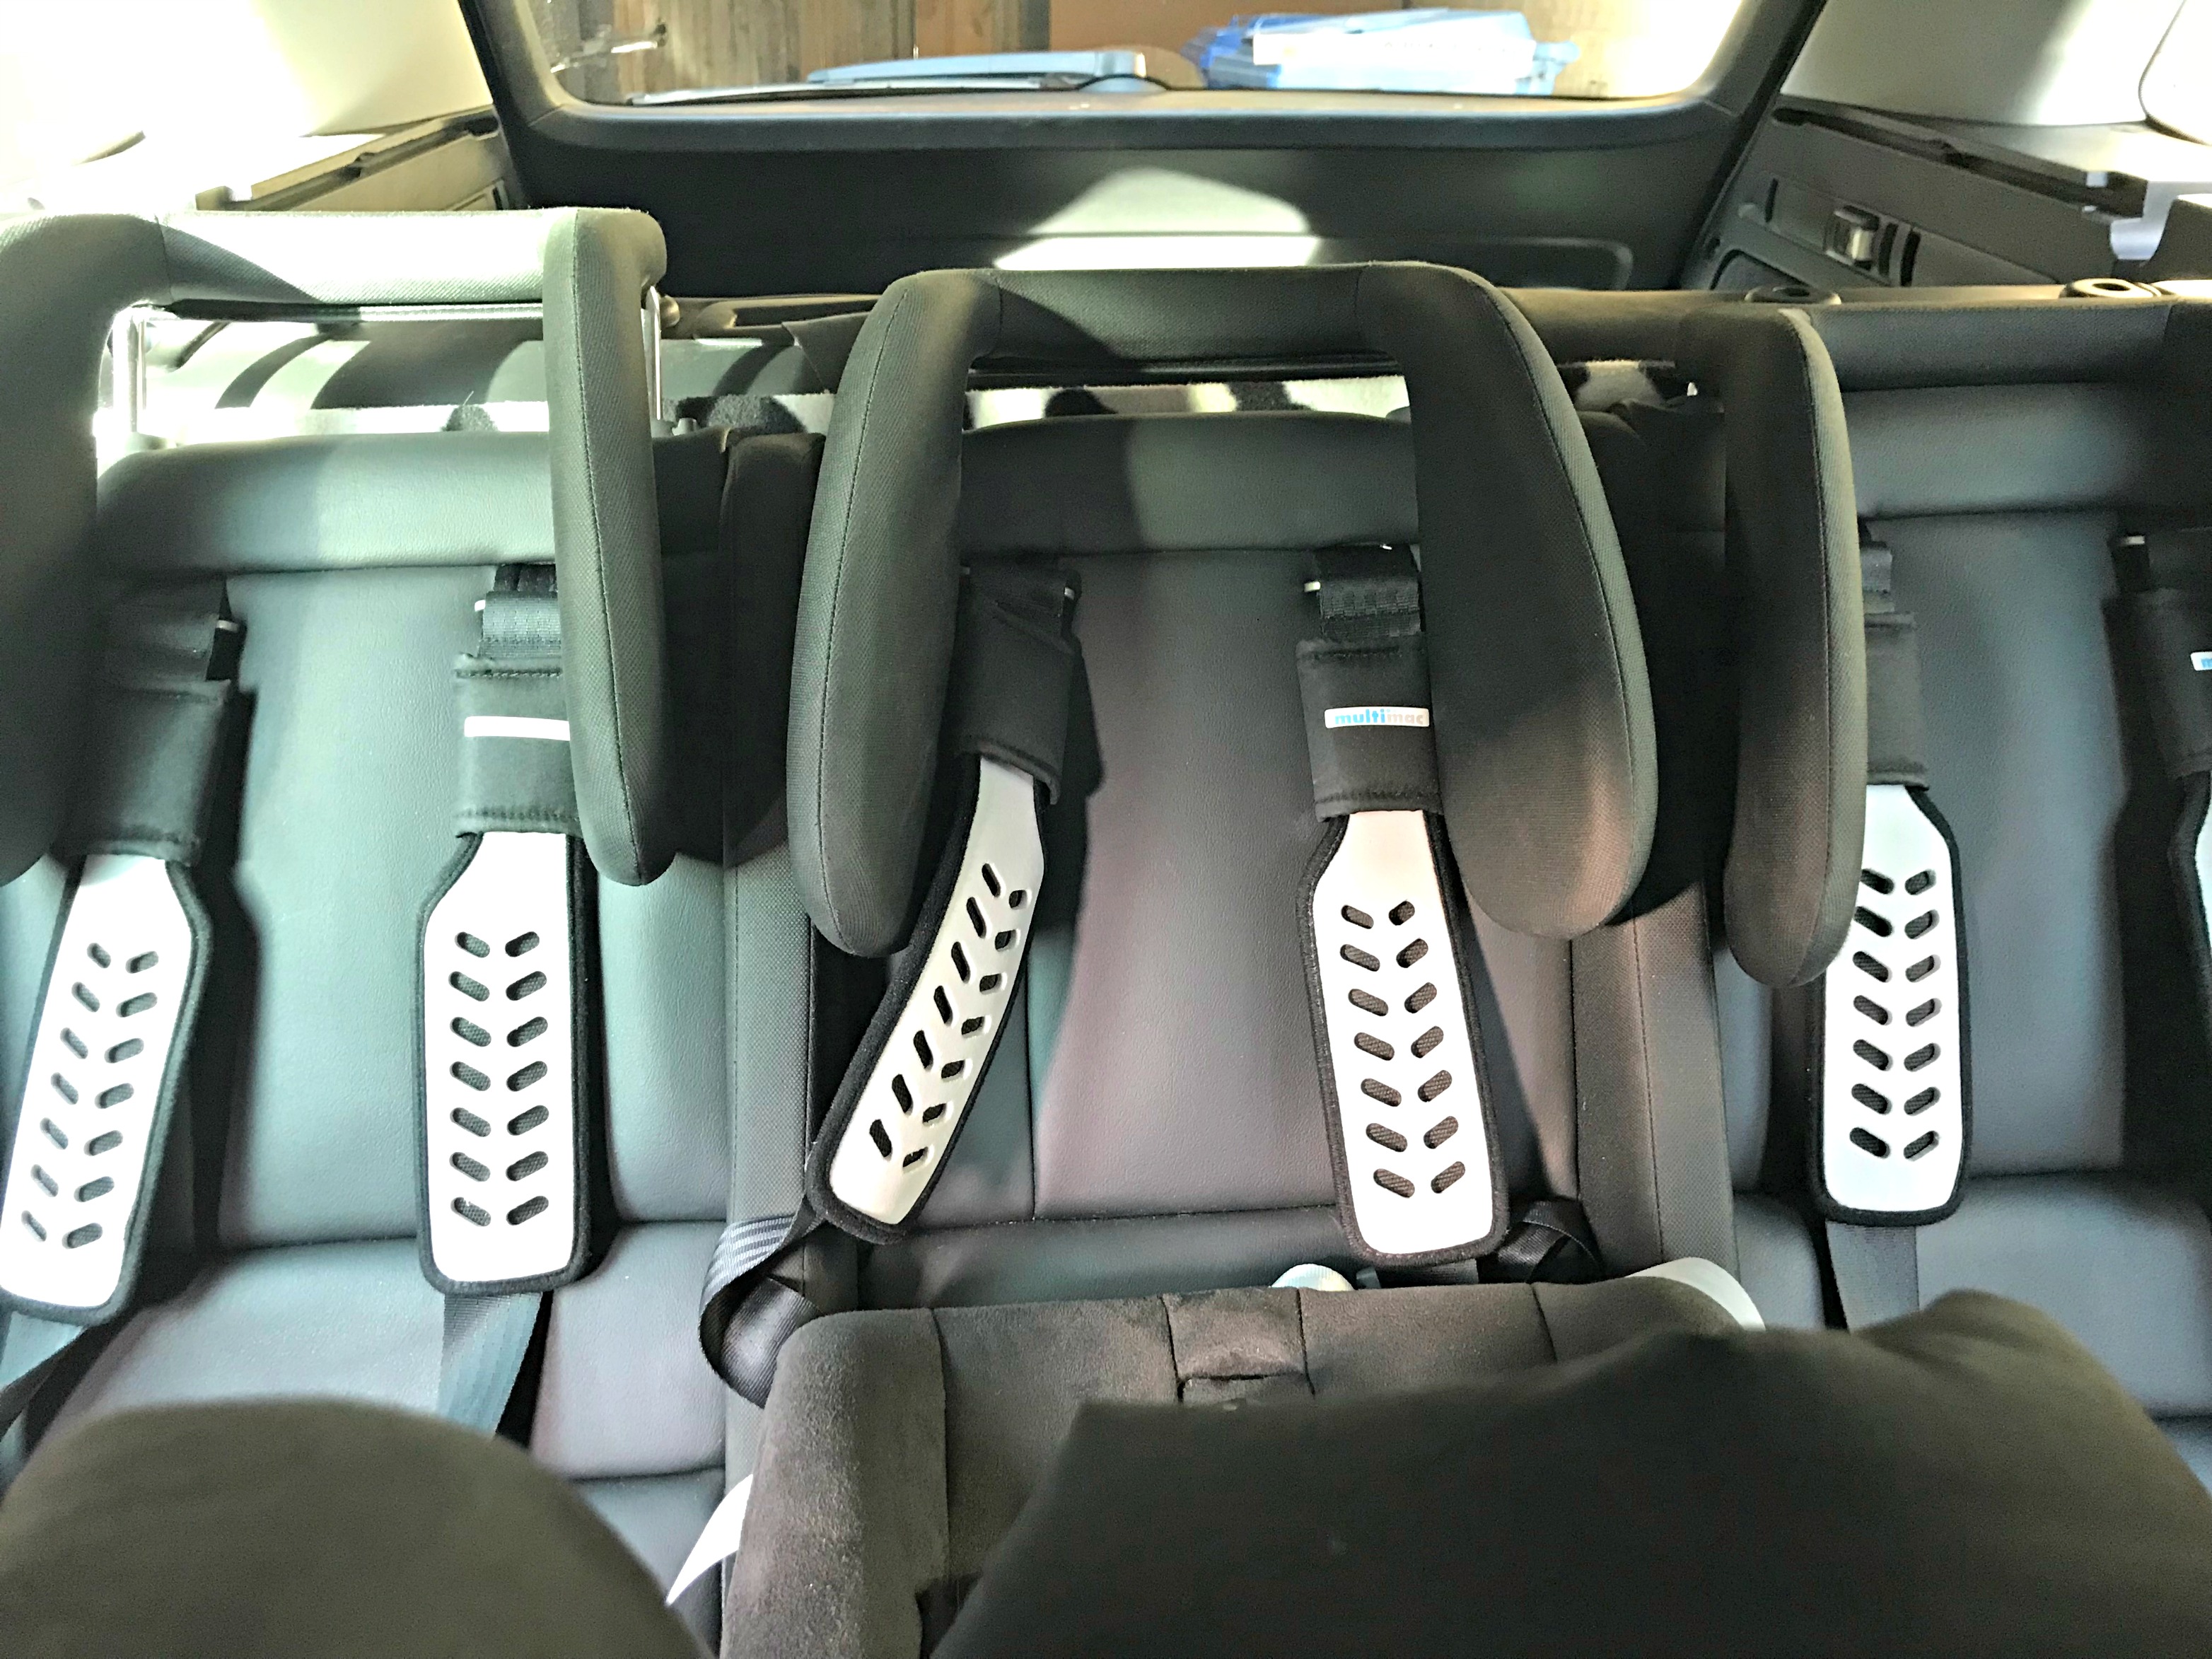
So, with some googling, we found a solution by a UK based company called Multimac. Multimac make a seat unit that fits over the rear seat in your existing car. It provides 3 or 4 seats with proper 5 point safety harnesses. A baby seat (the Minimac) can be attached to the unit and seat belt extenders may be used to allow the normal belt and sash belts to be used by adults or kids over 12. Two seat sizes are available in the 3 seater, standard and club. Club seats are wider but more expensive. We managed to find our Multimac 1000 (3 x standard seats) secondhand for a good price. If you’re buying new, it’s worthwhile thinking about this in advance as there is, roughly, a 12 week lead time on new units.
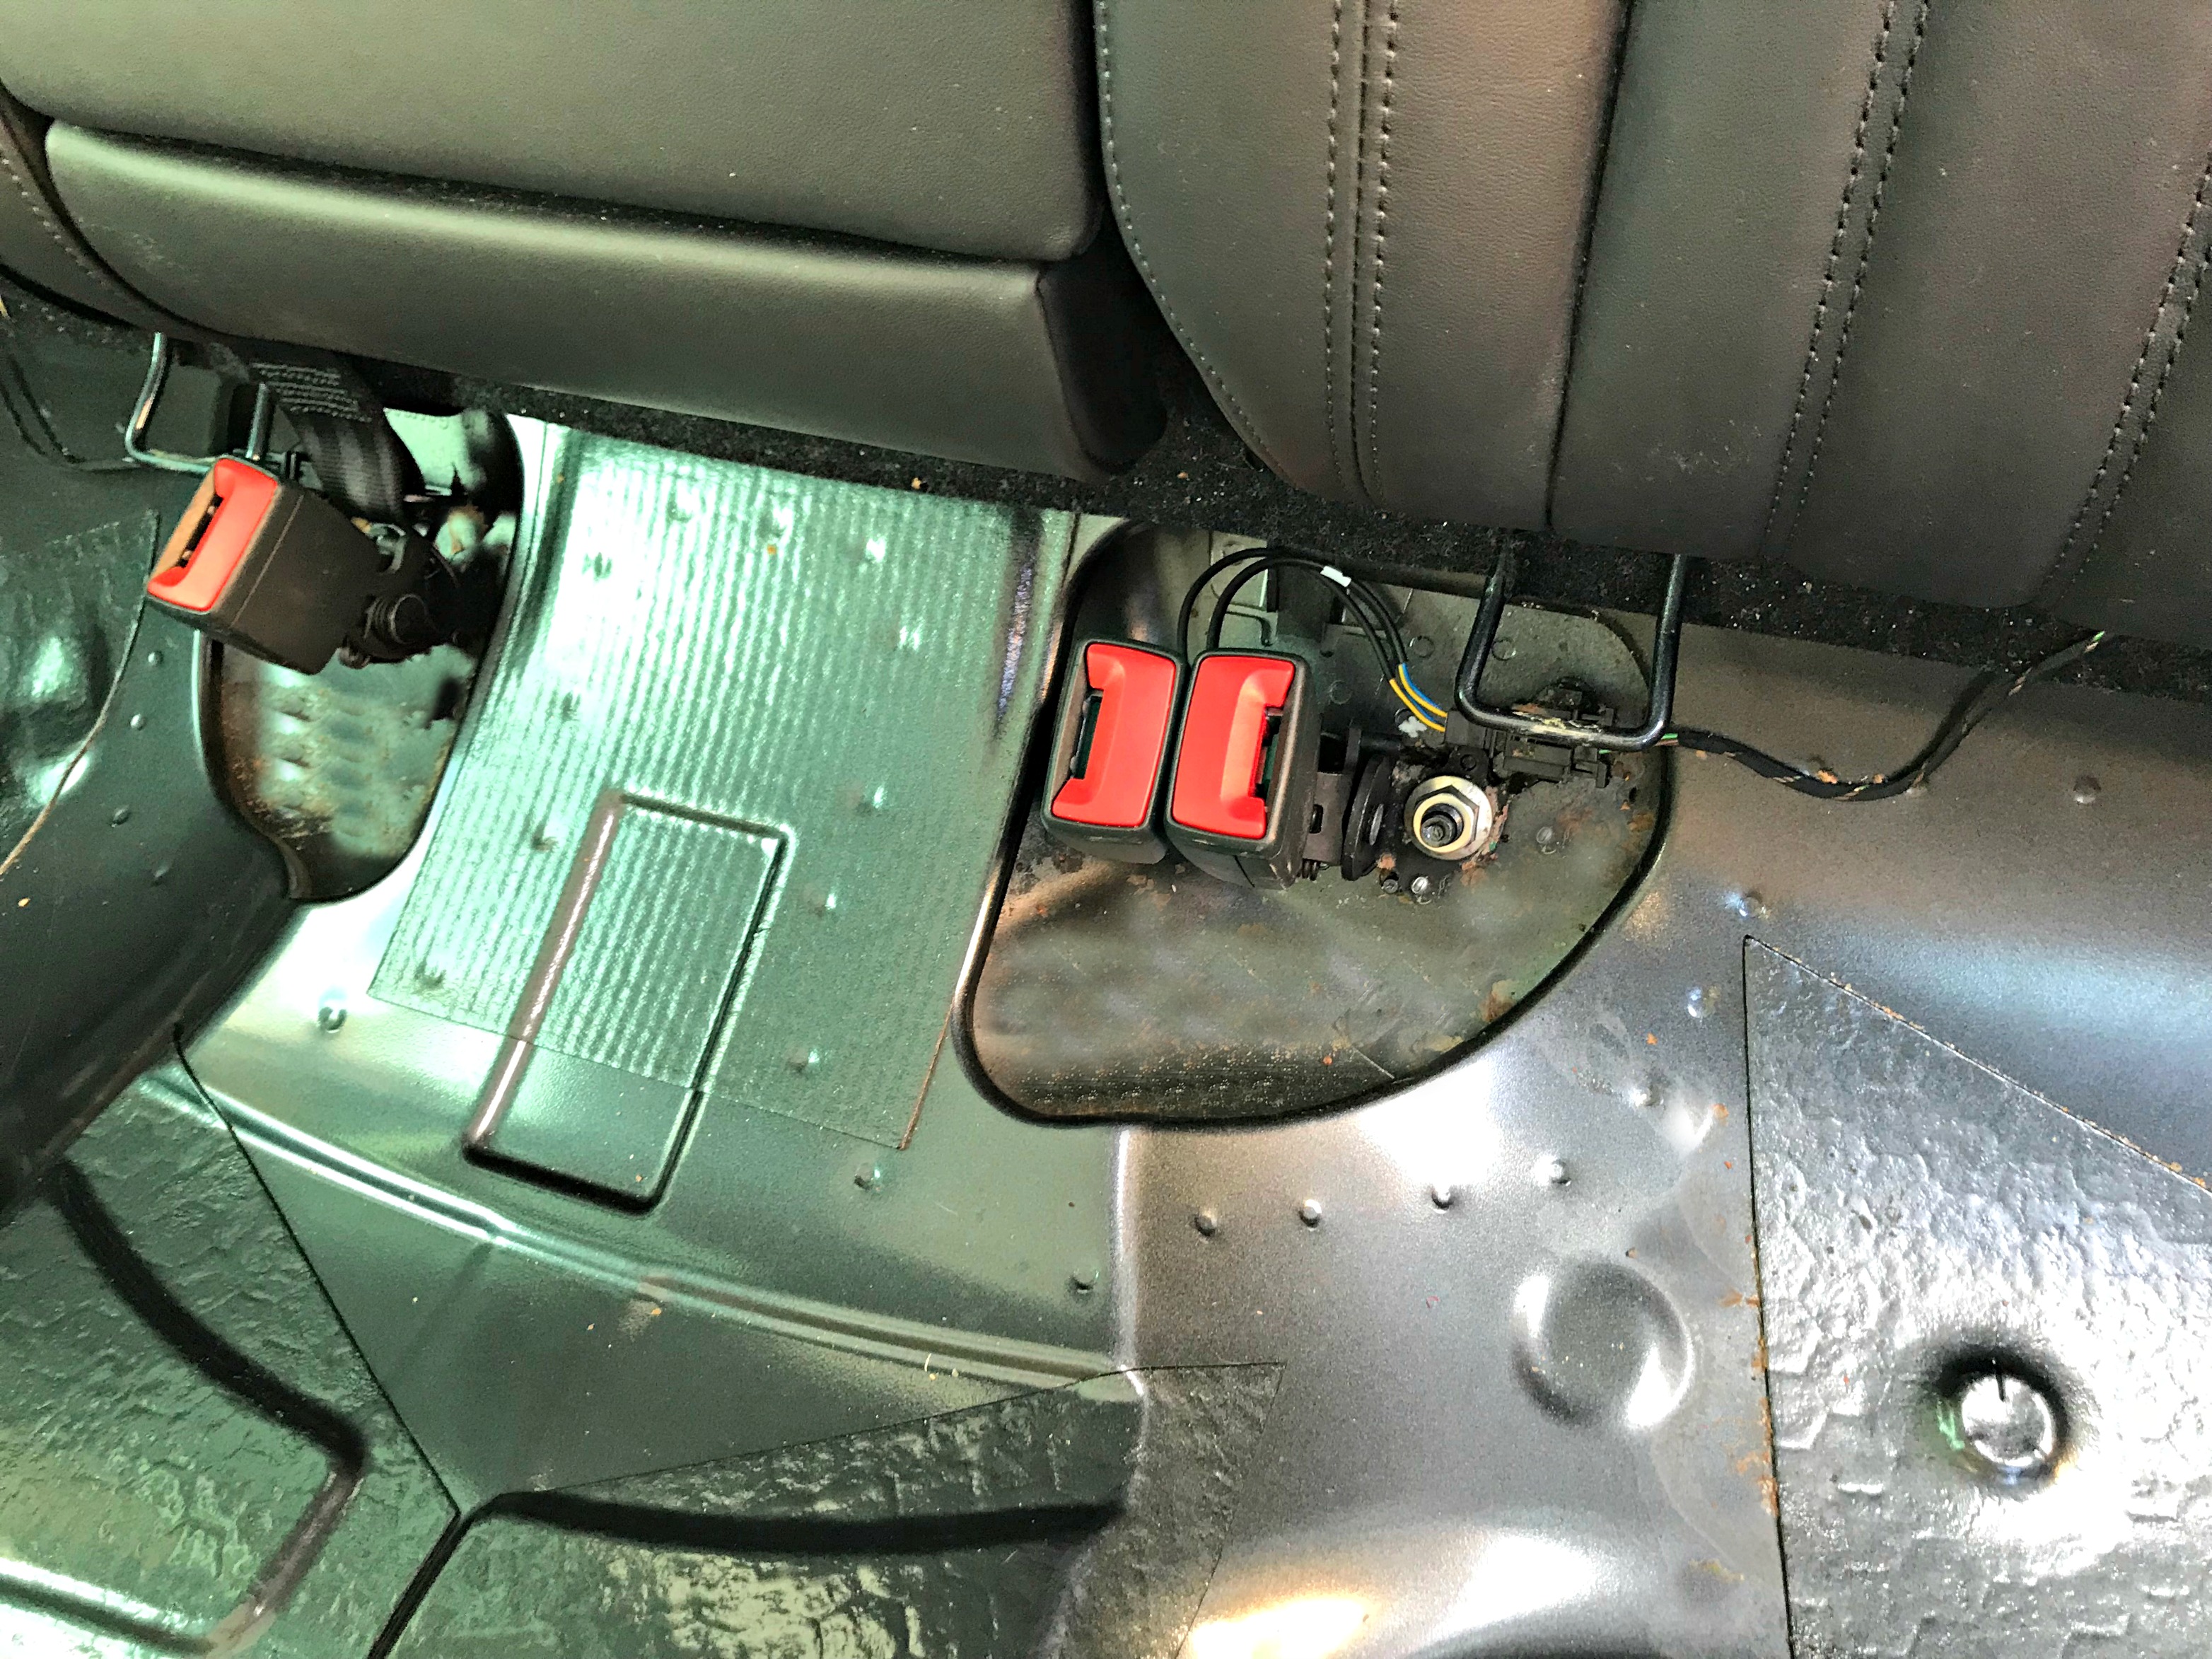
The seat attaches to the vehicle via the seat belt buckle studs. Straps are attached to these which are then held using ratchet clamps to stop the seat moving forward. The seat is stabilised using metal legs. In some vehicles (people carriers) the straps may need for fitting points to be drilled into the car, this can be done by a specialist fitter.
As our local fitter is in Oxford and as I am somewhat mechanically capable, I decided to try fitting our unit myself. The main purpose of this article is to show how I fitted ours. On googling I didn’t find a lot of information outside of Multimac around fitting, most references are from Mumsnet talking about how good the Multimac is, but little practical advice. Multimac themselves are really helpful, even though we had bought ours second hand I got a lot of good advice from their salesperson, Luke and also Kevin, a senior technical person.
In addition to the seat unit we purchased second hand, we also bought a car specific fitting kit for our Superb, a seat belt extender and the Minimac baby seat. All items were purchased ourselves.
As I said, I’d had a number of conversations with Multimac around what we actually needed. During the course of these, one thing that came out was that our rather plush rear seats were curved so the first job was to create a flat surface to rest the back of the Multimac on. As this was non-load bearing I took a piece of 5.5mm plywood and cut it to size. For looks and also to protect the leather of the seat from rough edges I used a staple gun to staple an old blanket over the plywood.

Next step was to fit the straps that secure the Multimac to the car. These are industrial grade webbing and herein is an advantage, these straps can tolerate around 3 times the force of an ISOfix mount, so the seat is safer in an impact. Fitting the tethers to the Superb was nice and easy, the seat belt buckles attach to the structure of the car using a stud, I simply had to undo the stud, slip on the tether and reattach the buckles. I tightened the nut to 45Nm and made sure the tethers came over the back of the seat cushion. In some cars, where the buckles bolt in, eyebolts are supplied with the fitting kit that replace the seat belt bolts. The tethers then attach by carabiners. As I said, in some cars it’s necessary to make modifications to the structure of the vehicle (tap and thread holes), I would not do this myself but I felt comfortable bolting up the tethers. In the Superb there is a pin to stop the seat belt buckle rotating too far, for this reason I had to mount the buckle facing upwards. I figured this was ok as I could not see any points at which the tether would contact metal fittings and wear under vibration in this orientation. A note on torque settings. I tend to work on my motorcycles from time to time and, due to their tendency to have steel bolts tapped into aluminium engine blocks, I am picky about torque settings. Not everyone needs to be like this. In this scenario though, I would really recommend borrowing or buying a torque wrench (and some deep sockets to go with it as standard size will not go on the stud). Looking around there’s a lot of advice on the internet about doing seat belt bolts up ‘FT’ (****ing tight), ignore this, manufacturers supply a torque setting for a reason. The torque setting here, 45Nm is actually relatively low. By overtightening bolts you increase latent stress levels and can reduce their effectiveness and in a safety critical area like this, I was not prepared to take the chance.

With the tethers in place, all that was left to do was to install the Multimac itself. Before I put the plywood board in I put the seatbelts into the buckles. I did this to stop the seatbelt alert in the car complaining when it detects the weight of the Multimac. That done, I put in the covered plywood board and laid a blanket over the back seats. The blanket was to reduce any rattle and also to make sure that the leather of the seat stayed in tip top condition.

I brought the Multimac from the garage after having removed the seat cushions and laid it on the back seat. I would recommend getting some help in doing this as it was reasonably heavy. The tethers thread through slots in the back seat, making sure not to twist them as they go in. Under the outer seats are two large ratchets, first step is to pull in the spring bar at the top of these and fold them flat. The tethers then thread through the slot in the middle of the ratchet. With the Multimac in place, I took up the slack in the tethers and set about getting the legs sorted.
The legs slide into the front of the Multimac and have screw adjustment for length. So that they were flat against the floor of the car I put them underneath the corner of the floor mat. I wound out the legs so they were making good contact and then set about tightening the whole thing down.

Tightening down was really easy. All I had to do was pull in the spring bar on the ratchet to close the ratchet up and then work the ratchets. I did this on alternate sides to keep the tension even. Another thing to bear in mind here is that, although the seat needs to be held in place, that’s all it needs to do. The tethers are there to stop the seat moving forward under rapid deceleration, so they don’t need to be over tightened. Stability for the seat comes from the legs being properly adjusted.

With that, everything was pretty much done, I installed the seat cushions by threading the buckle through the aperture at the front, pushing them into place at the rear and gently pushing the front down. I decided to put the baby in the middle as it means that the kids can watch their DVD screens on our upcoming drive to Wales. The Minimac baby seat is easy enough to install, a metal tongue locks into a slot at the rear of the seat and it latches down at the front. Adjustment on the seats comes from a tensioner strap at the front of the unit, it was all pretty simple. So we’re all set for holiday, after which I’ll produce a review on how the Multimac was in action.
Key takeaways from this:
1. Always get a new fitting kit if you are buying second hand
2. Have a look at your car prior to fitment to work out if you need seatbelt extenders or a plywood backing
3. If you have stud type buckle mounts have access to a torque wrench and deep drive sockets.
4. If you can, get some help lifting the Multimac in and out, you can do it solo (I did) but it’s not a pleasant or easy experience.
